Yamashin Bunka, my project in thinning.

If you have questions about sharpening products, steels or techniques post them here.
Post Reply
Miles
Posts: 237
Joined: Fri Dec 06, 2019 1:12 pm
Location: Seattle, WA, USA
Has thanked: 615 times
Been thanked: 117 times

Yamashin Bunka, my project in thinning.

Post by Miles »

Image

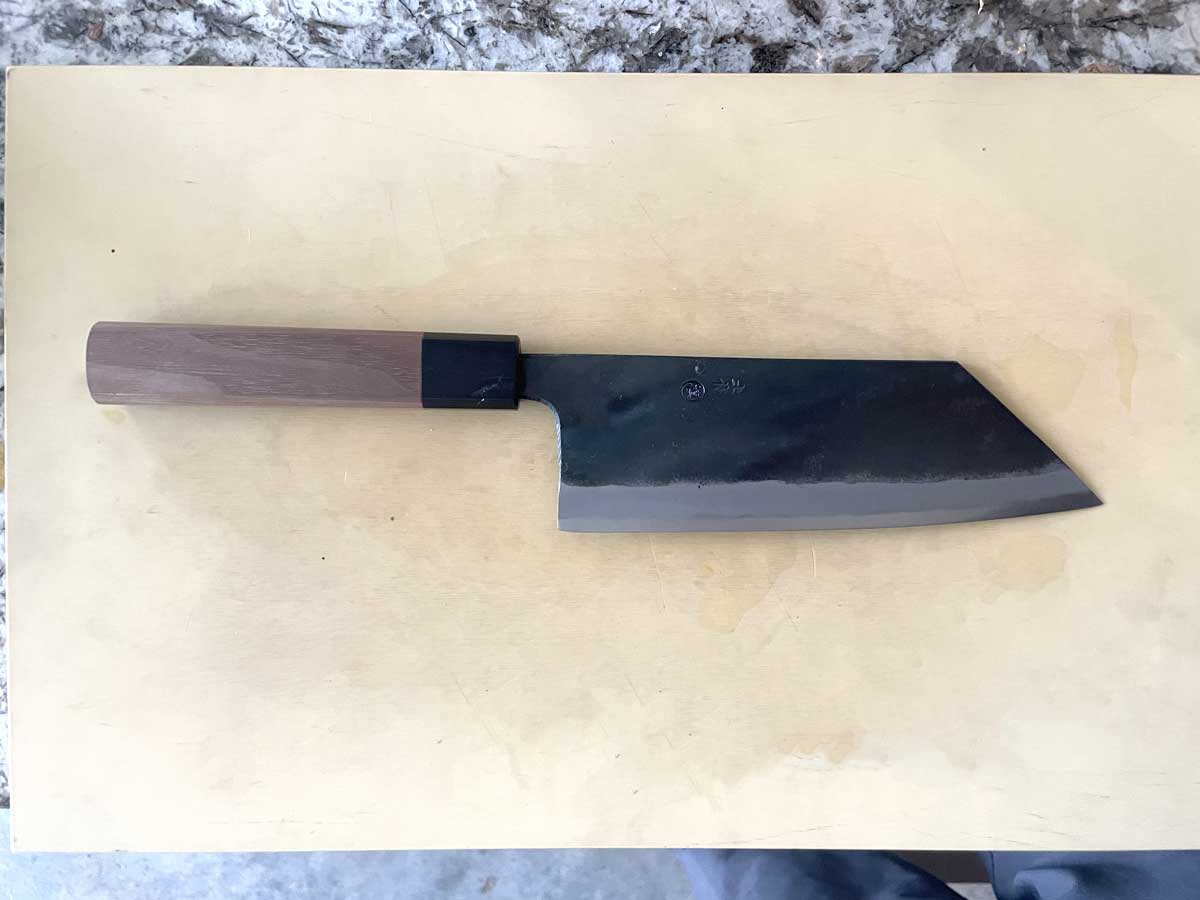
I bought it based on the the height of the knife and price. That’s not typically how I select my knife, but it looked pretty interesting- tall, rustic and inexpensive.

After receiving it, I examined it carefully. 55.6mm tall and 174mm on the edge. The blade road was pretty short compared to my other bunkas and some rough finish on the spine- one side was sharpish and the other roughly filed. The heel had a 3mm mini back belly. The handle was pretty nice for a knife of this price but boy the fit and finish was pretty rough.

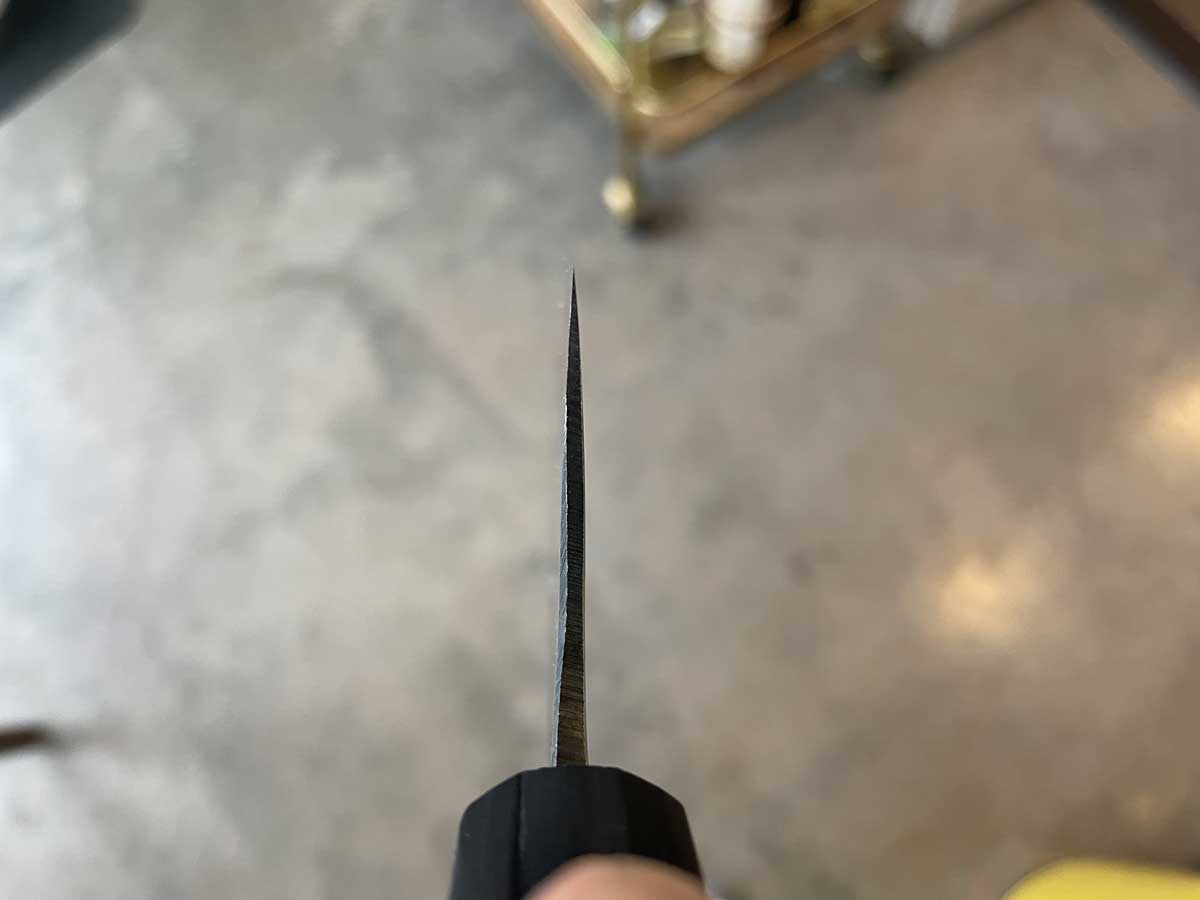
The edge OOB was not very sharp which wasn’t a surprise. I did my first round of sharpening- i lightly on the 1k,2k,5k and some stropping. The edge seemed pretty sharp as a shirogami #1 would be, to the touch it felt like a razor and newspaper cut with a nice smooth sound. Then I put it to test on the board. What I found was that with hard produce after the edge entered an item it met with some resistance . I can’t remember all of items I tested but I remember both carrot and potato- not good. Crack. Crack. Perplexed I decided it was time to make some changes- thinning. I'd done a little bit of thinning, but nothing to extent that i was about to embark upon.

I started with a 320 stone and put the blade flat on the stone with pressure on the shoulder. I might have been going for 30 minutes before I decided that I needed do go more heavy duty. I switched to a 150 nubatama (brick-like thing) and after another 30 minutes I reviewed my work. The spine edge had a decent amount of sanding going on. Note to self, next time put some painters tape on the spine edge. The shoulder was moving up, but it was going to be a long road. I went another 30 minutes before I noticed some dishing in my stone. As I flattened my stone, I decided to change course. Let’s just do some sandpaper.

Using some 3M purple 150grit (Lowes) wrapped around one of my thinner stones, I attached it with painters tape underneath and propped on top of another stone. I went at it again. This time metal dust was coming off much faster. I tried a bit of tsubaki oil (camellia) to see the difference and it just seemed to be more effective to go dry. I discovered a couple of low spots and at first I was consumed with evening them out. ultimately decided that it might do more damage than good.

After moving the shoulder higher (like > 50% more) I moved my pressure to the middle of the blade road. It seemed like this was helping make it thinner behind the edge. However, when I compared my work to a Kurosaki bunka and there was no comparison. He’s got different techniques and different tools.

At some point, I just gave in and switched to pressure near the edge- getting that zero grind going. That was really rewarding and I could feel the edge getting thin and sharp. I didn’t spend too much time here since I knew that I was going to sharpen it after i was done. I messed around with higher grits to smooth things out only to undo it by thinning it even more. it's kind of scratch that itch kind of thing.

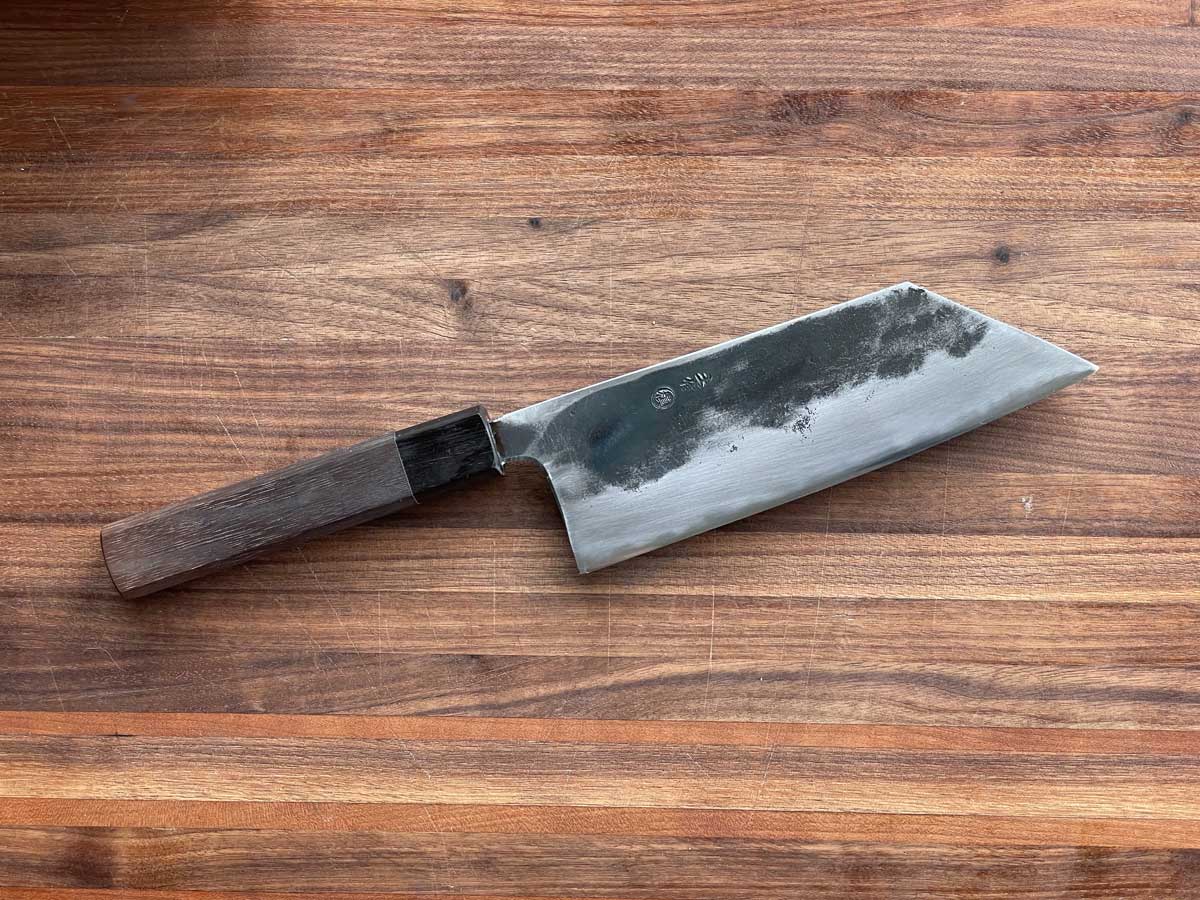
After doing a full progression from 1k,2k,5k,10k + strop, it became strikingly sharp. Unrecognizable in looks and performance from OOTB.

The knife is great now. It’s not better than my other bunkas, but there’s an emotional connection with the time invested in it and there’s a good story of learning. I now really appreciate the rest of my knives that are so “thin behind the edge.” My yamashin is my beautiful ugly.

After choil shot
Image

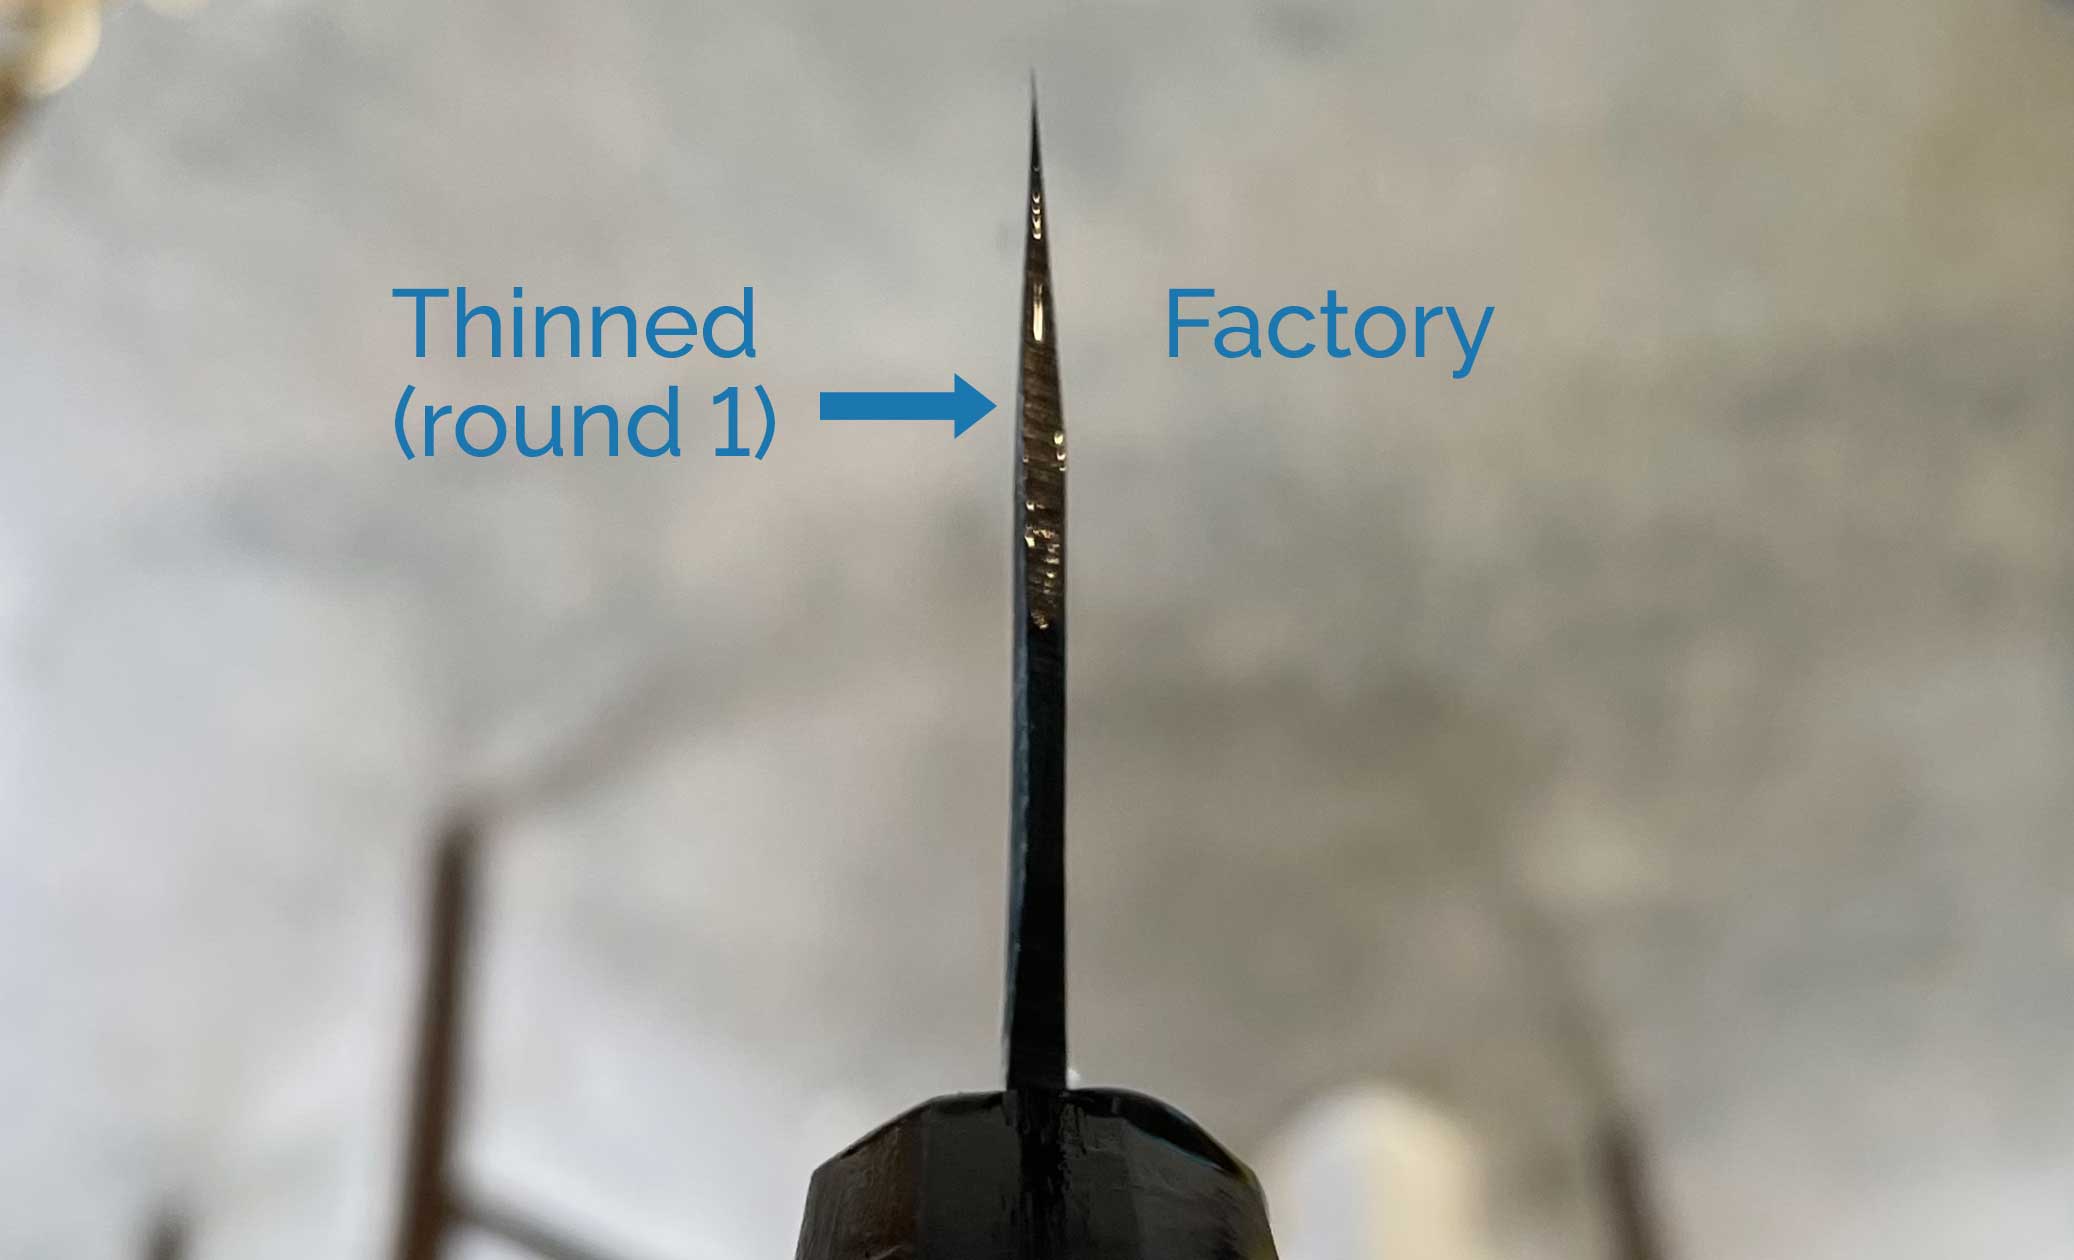
Comparison choil shot
Image

Before... new, pretty and wedgy.
Image
Last edited by Miles on Mon Feb 08, 2021 7:21 pm, edited 1 time in total.
bob_m
Posts: 46
Joined: Mon Oct 22, 2018 6:52 am
Has thanked: 27 times
Been thanked: 17 times

Re: Yamashin Bunka, my project in thinning.

Post by bob_m »

Images aren't working - would love to see it.
jknife
Posts: 248
Joined: Sun Mar 29, 2020 8:54 am
Location: north Ontario CAN
Has thanked: 142 times
Been thanked: 151 times

Re: Yamashin Bunka, my project in thinning.

Post by jknife »

Great post and congratulations on your success.
The pig is a magical animal. It takes vegetables and turns them into bacon.
Chappychap
Posts: 503
Joined: Sun Oct 11, 2020 3:20 pm
Has thanked: 733 times
Been thanked: 246 times

Re: Yamashin Bunka, my project in thinning.

Post by Chappychap »

It looks like you did a phenomenal job. Every now and then I toy with the idea of adjusting a couple of my knives like this, so your write up is great food for thought too. Thanks for sharing and congratulations.
d_rap
Posts: 662
Joined: Sun Feb 09, 2020 11:47 pm
Location: Los Angeles
Has thanked: 369 times
Been thanked: 444 times

Re: Yamashin Bunka, my project in thinning.

Post by d_rap »

Great write-up, pics are really illustrative too. Must be very satisfying cutting with this knife.
David
Miles
Posts: 237
Joined: Fri Dec 06, 2019 1:12 pm
Location: Seattle, WA, USA
Has thanked: 615 times
Been thanked: 117 times

Re: Yamashin Bunka, my project in thinning.

Post by Miles »

This project was a wild ride of “oh man what did I buy? am I going to ruin it, oops too late. $hit this is taking forever. Which direction should I be going? gawd this is uneven, what’s up w these low spots? I’m done. geez I gotta grind waay more metal. oh this nothing like my _____. This won’t do, need more work near the edge. effn-a this is crazy- who does this? Im done. If it was just a little bit...”

So much cringe thinking about this project. Gotta start some where.
Bensbites
Posts: 2596
Joined: Mon Jan 30, 2017 7:42 pm
Location: Massachusetts
Has thanked: 344 times
Been thanked: 254 times
Contact:

Re: Yamashin Bunka, my project in thinning.

Post by Bensbites »

Very nice! I wish I had that level of patience.
User avatar
ken123
Posts: 5342
Joined: Wed Jan 25, 2017 2:53 pm
Location: Northern California
Has thanked: 253 times
Been thanked: 316 times
Contact:

Re: Yamashin Bunka, my project in thinning.

Post by ken123 »

GREAT learning experience! Yea thinning can expose you to elements of doubt to say the least. I do like the 150 Nubatama but would go with the new 150 platinum stone these days which stays flatter longer. The resharpening part of it all can also be frustrating as you now have a thinner edge and must be concerned with overly convexing an edge.

Good job!

Ken
jknife
Posts: 248
Joined: Sun Mar 29, 2020 8:54 am
Location: north Ontario CAN
Has thanked: 142 times
Been thanked: 151 times

Re: Yamashin Bunka, my project in thinning.

Post by jknife »

Bensbites wrote: Tue Feb 09, 2021 6:38 am Very nice! I wish I had that level of patience.
I think I remember you were building a 2x72 belt grinder which would definitely compensate for a lack of patience. Me? I have neither. I would love to have a 2x72 but I think my wife would vote for patience. :D
The pig is a magical animal. It takes vegetables and turns them into bacon.
Bensbites
Posts: 2596
Joined: Mon Jan 30, 2017 7:42 pm
Location: Massachusetts
Has thanked: 344 times
Been thanked: 254 times
Contact:

Re: Yamashin Bunka, my project in thinning.

Post by Bensbites »

jknife wrote: Tue Feb 09, 2021 8:31 pm
Bensbites wrote: Tue Feb 09, 2021 6:38 am Very nice! I wish I had that level of patience.
I think I remember you were building a 2x72 belt grinder which would definitely compensate for a lack of patience. Me? I have neither. I would love to have a 2x72 but I think my wife would vote for patience. :D
Yes, I have gone deep down the knife making rabbit hole.
bob_m
Posts: 46
Joined: Mon Oct 22, 2018 6:52 am
Has thanked: 27 times
Been thanked: 17 times

Re: Yamashin Bunka, my project in thinning.

Post by bob_m »

It looks good. It's not as flat (has more belly) as it originally was. I imagine this makes it more forgiving though.
orezeno
Posts: 698
Joined: Wed Feb 01, 2017 8:34 am
Location: Annapolis, MD
Has thanked: 29 times
Been thanked: 83 times

Re: Yamashin Bunka, my project in thinning.

Post by orezeno »

Great work!

It is one thing to understand, theoretically, that you need to remove an entire volume of metal when you thin, but it's "driven home" when you do it by hand. Another experience where the amount of work is humbling like this is mirror polishing a knife.

Admittedly, I would do the majority of the metal removal with a belt sander these days. However, to do this by hand, I would suggest starting with a very coarse diamond stone, or extremely coarse sandpaper mounted to a very flat surface (glass, marble counter-top, etc.). Like me, you learned this the hard way. The flat surface helps identify peaks and valleys on the knife's surfaces as you abrade.

If you do all metal removal with a coarse diamond stone or coarse (aluminum oxide) sand paper (you'll wear through sheets of this), the Nubatama 150 will remove those scratches. From then on, it is a matter of refining the scratch pattern.

Another thing I'd suggest is to create reference points on the knife's surface and use calipers to measure thickness at those points during thinning. This helps you understand if the knife has uneven thickness before you start, and allows you to adjust grinding as you thin so that you create a more even result.
Greg
Miles
Posts: 237
Joined: Fri Dec 06, 2019 1:12 pm
Location: Seattle, WA, USA
Has thanked: 615 times
Been thanked: 117 times

Re: Yamashin Bunka, my project in thinning.

Post by Miles »

Re: calipers. Great idea. I have one but didn’t use it. Im sure it get me sanding away... again.

Polishing is something that I haven’t spent much time researching or thinking about. Just tried different stones to see what they did. Guess it’s time to be a bit more pragmatic.
orezeno
Posts: 698
Joined: Wed Feb 01, 2017 8:34 am
Location: Annapolis, MD
Has thanked: 29 times
Been thanked: 83 times

Re: Yamashin Bunka, my project in thinning.

Post by orezeno »

Miles wrote: Wed Feb 10, 2021 9:37 am Re: calipers. Great idea. I have one but didn’t use it. Im sure it get me sanding away... again.
The first few knives I thinned I did not use calipers. After a while, though, it is useful to know how much material you're removing and if you're reducing the knife evenly. Having measurements really helps with that. Thinning can also be a bottomless pit. Sometimes there's a knife that appears to be symmetrical about its centerline, but is actually not. In these situations my tendency is to "correct" things. This results in a transition from knife sharpening (which I do) to knife making (which I don't do) and burns hours of time (which I don't have).
Greg
Post Reply